


Nessa's Color match hair/eyebrows with SimPE
May 14, 2008 21:14:52 GMT
Post by Administrator on May 14, 2008 21:14:52 GMT
Originally posted by xX wordsmith Xx.
First of all, my thanks to Dr.Pixel for posting about this at N99 and MTS2. Why this info isn't engraved in stone somewhere is beyond me. His posts are gospel (almost).
Secondly, this isn't a tutorial to put custom hairs in the correct color bin for the game's hairstyles. I don't know how to do it. You can find info at MTS2. Or post in the help forum here.
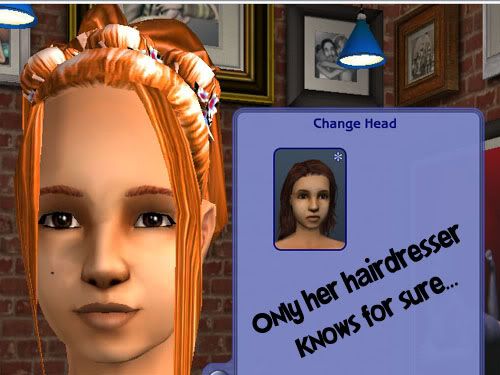
Now, you downloaded or created a fabulous new hair. Good for you! You run the Sims 2 game, excited to create a new Sim with this dashing do. Remarkable ginger hair... with blond eyebrows?
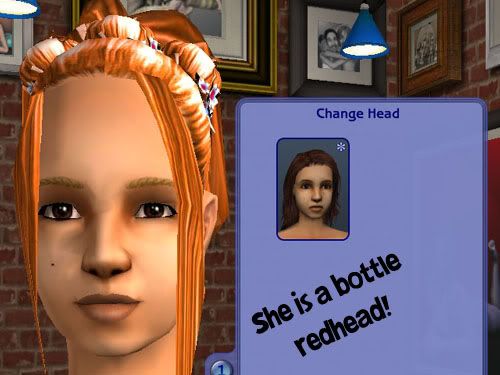
Oh no! The creator didn't base the hair off of an existing Maxis hair (red for red, blond for blond, etc.). Just have to deal with it, you suppose.
Nope.
Here's a simple fix, provided you have the SimPE program. The first time I actively used SimPE was for this purpose so trust me, this is easy. And you will have pics.
You are going to be using finished hair packages. These are files you downloaded, unpacked from Sims2Pack packages or imported into the game from Bodyshop. Do not use the .package files in the Project folders.
What I find helpful is putting my hair file or files into a temporary folder, like so:
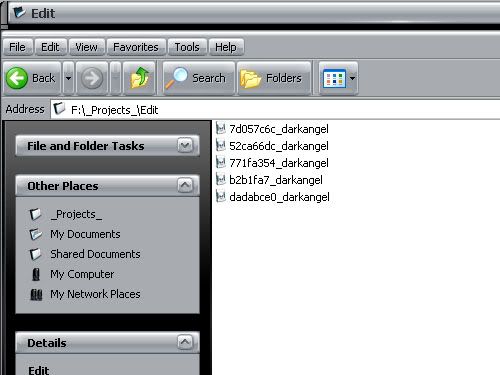
My little Edit folder is where I put files I will "edit" with SimPE. I just find it handy to be organized at first, especially if you have an unholy amount of downloads.
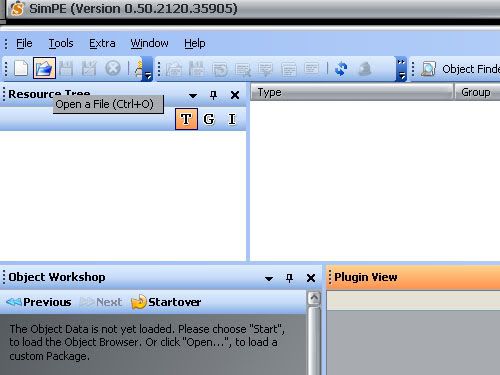
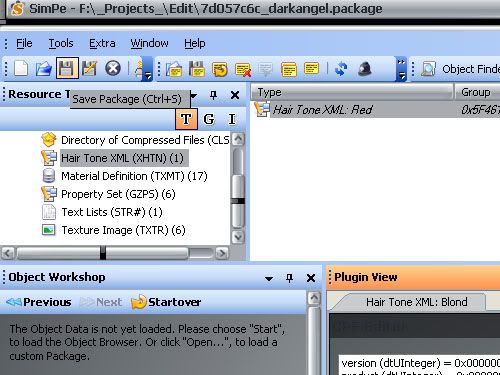
After opening up SimPE, you want to click File, then Open. Or just use the handy Open button. Select the .package you will edit. The program will then take a minute to load up. Then you will see the following gibberish.
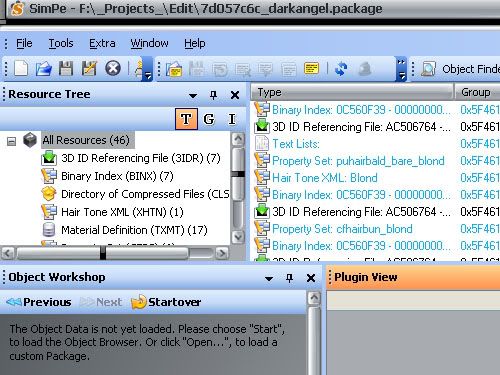
Do not be afraid. Most of the stuff in the Resource Tree you will not have to deal with. Do take note of two things: Hair Tone XML and the last one, Texture img. If you happen to not know off hand what color hair your .package is, just select the Texture img. Especially if the file name is a sequence of numbers or says nothing about color.
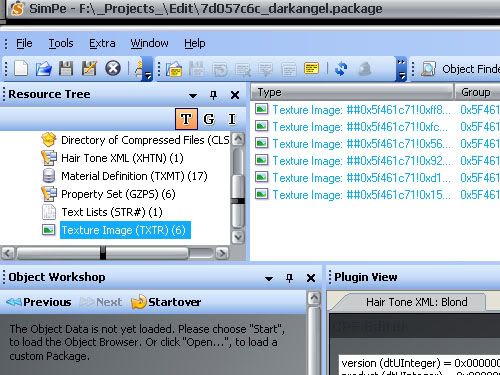
On the right-hand side, go through each img as each one is an age stage. You can deduce what color the hair should be if the creator was thorough enough to make each stage consistent. Once you've made a choice, go ahead and choose the Hair Tone XML.
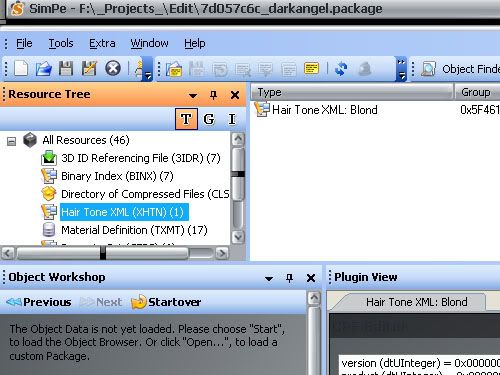
Those other parts of the tree are gone. So click Hair Tone XML in the right pane and some information will show up in the Plugin View pane.

We are only going to edit the name (middle line) and proxy (last line). It has been said that really you only have to change the proxy but I do both. Again, because DrPix said so. Also for symmetry.
Click the name and the same line appears in the right pane. You can edit the name here.
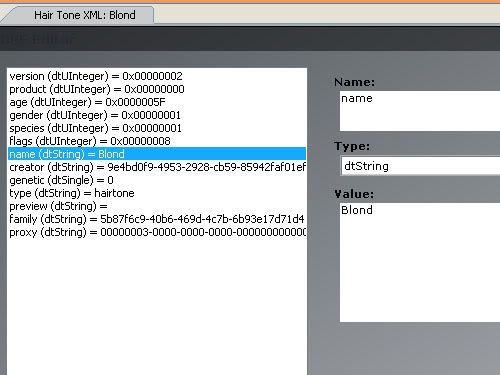
In this example, my ginger hair is showing blond. I want it red. I delete the word "Blond" and type in "Red". Here is the breakdown:
Black
Brown
Blond
Red
Gray
Also note that the first letter is capitalized. So I do the same. I often want to type Blonde so don't do that. I hope that is the correct spelling of gray.
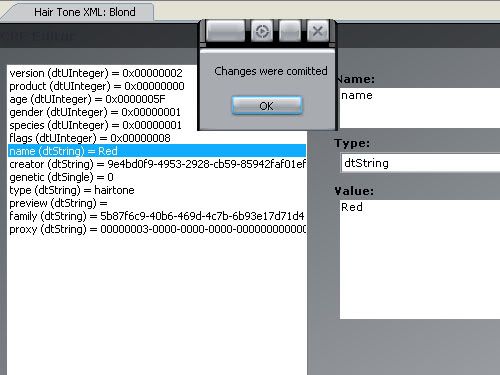
After I type in the new color, I click the commit button on the bottom right.
You will see some lines become italic. This is okay, as this is just pending. The file hasn't been changed so we can still make corrections. Plus, we aren't finished. Remember the proxy line?
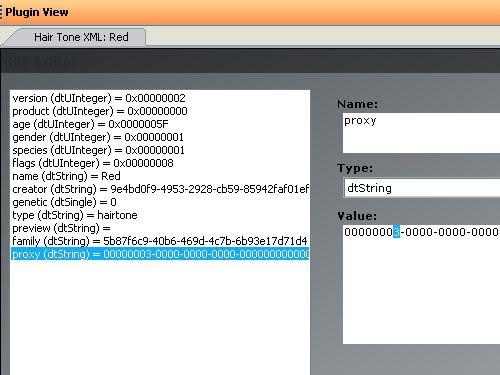
This is what changes the eyebrow. This is the breakdown:
Black = 1
Brown = 2
Blond = 3
Red = 4
Gray = 5
I have the number 3, meaning a blond eyebrow. I only want to change this single digit. I will put a 4 in its place.
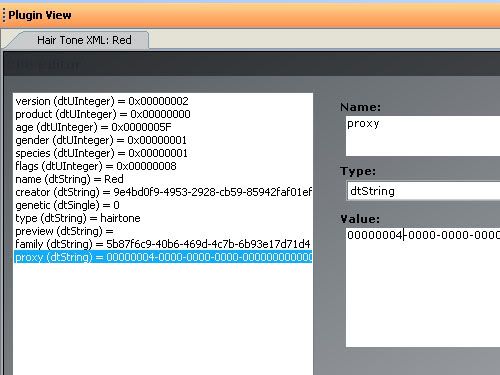
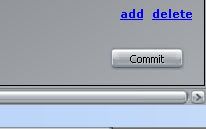
Then I click the Commit button again. Another line will be italic to show that work is pending.
Once you've Commited and done both parts, go ahead and click Save to finalize your work.
Yay! All finished. So let's see if everything went according to plan. Go to your work folder and you will find your file plus its .bak counterpart.

The .bak is the file you edited originally, before saving. Keep it (in case you made a mistake; just rename the .bak to .package) or delete it. I deleted it. I'll take my newly edited file and put it in my Downloads folder (or wherever you put your hair files. Make sure you have the mesh too if that applies.
I'll run the game and create a new Sim with this hair.
Success! This wasn't the greatest example but now you see.
~Note~
Anything marked gray will be for elders only. This only applies if you are editing the hairs for color bins (in a different tutorial).
When it comes to outlandish hair colors, I tend to leave them black (since I often find them black) or mark them so. For now, there isn't a sure-fire way to make a new color definition (myself, I could do with a number 6 for my many white/ultra-platinum hairs).
Perhaps you wonder why the creator doesn't correct the file her/himself? Many creators don't actually play the game through, especially to the second generation where the difference would stand out. Also, many Simmers (myself included) have custom skintones that include eyebrows so we remove eyebrows from our Sims. Or we use custom eyebrows because we don't like the Maxis ones.
Another major culprit is reusing textures in Bodyshop. I use the same project folder again and again, making a platinum off of a blond and then using the same texture files to make a redhead. The files are still blond at its base because that was what the original hairstyle was when I exported it in BS. There are so many recolors based off of mismatched hairstyles that the problem is compounded. Mismatched hairs and eyebrows are not a gamebreaker. Thankfully, you can use SimPE to fix this little oddity.
Have fun,
~Nessa
First of all, my thanks to Dr.Pixel for posting about this at N99 and MTS2. Why this info isn't engraved in stone somewhere is beyond me. His posts are gospel (almost).
Secondly, this isn't a tutorial to put custom hairs in the correct color bin for the game's hairstyles. I don't know how to do it. You can find info at MTS2. Or post in the help forum here.
Now, you downloaded or created a fabulous new hair. Good for you! You run the Sims 2 game, excited to create a new Sim with this dashing do. Remarkable ginger hair... with blond eyebrows?
Oh no! The creator didn't base the hair off of an existing Maxis hair (red for red, blond for blond, etc.). Just have to deal with it, you suppose.
Nope.
Here's a simple fix, provided you have the SimPE program. The first time I actively used SimPE was for this purpose so trust me, this is easy. And you will have pics.
You are going to be using finished hair packages. These are files you downloaded, unpacked from Sims2Pack packages or imported into the game from Bodyshop. Do not use the .package files in the Project folders.
What I find helpful is putting my hair file or files into a temporary folder, like so:
My little Edit folder is where I put files I will "edit" with SimPE. I just find it handy to be organized at first, especially if you have an unholy amount of downloads.
After opening up SimPE, you want to click File, then Open. Or just use the handy Open button. Select the .package you will edit. The program will then take a minute to load up. Then you will see the following gibberish.
Do not be afraid. Most of the stuff in the Resource Tree you will not have to deal with. Do take note of two things: Hair Tone XML and the last one, Texture img. If you happen to not know off hand what color hair your .package is, just select the Texture img. Especially if the file name is a sequence of numbers or says nothing about color.
On the right-hand side, go through each img as each one is an age stage. You can deduce what color the hair should be if the creator was thorough enough to make each stage consistent. Once you've made a choice, go ahead and choose the Hair Tone XML.
Those other parts of the tree are gone. So click Hair Tone XML in the right pane and some information will show up in the Plugin View pane.
We are only going to edit the name (middle line) and proxy (last line). It has been said that really you only have to change the proxy but I do both. Again, because DrPix said so.
Also for symmetry.Click the name and the same line appears in the right pane. You can edit the name here.
In this example, my ginger hair is showing blond. I want it red. I delete the word "Blond" and type in "Red". Here is the breakdown:
Black
Brown
Blond
Red
Gray
Also note that the first letter is capitalized. So I do the same. I often want to type Blonde so don't do that. I hope that is the correct spelling of gray.
After I type in the new color, I click the commit button on the bottom right.
You will see some lines become italic. This is okay, as this is just pending. The file hasn't been changed so we can still make corrections. Plus, we aren't finished. Remember the proxy line?
This is what changes the eyebrow. This is the breakdown:
Black = 1
Brown = 2
Blond = 3
Red = 4
Gray = 5
I have the number 3, meaning a blond eyebrow. I only want to change this single digit. I will put a 4 in its place.
Then I click the Commit button again. Another line will be italic to show that work is pending.
Once you've Commited and done both parts, go ahead and click Save to finalize your work.
Yay! All finished. So let's see if everything went according to plan. Go to your work folder and you will find your file plus its .bak counterpart.
The .bak is the file you edited originally, before saving. Keep it (in case you made a mistake; just rename the .bak to .package) or delete it. I deleted it. I'll take my newly edited file and put it in my Downloads folder (or wherever you put your hair files. Make sure you have the mesh too if that applies.
I'll run the game and create a new Sim with this hair.
Success! This wasn't the greatest example but now you see.
~Note~
Anything marked gray will be for elders only. This only applies if you are editing the hairs for color bins (in a different tutorial).
When it comes to outlandish hair colors, I tend to leave them black (since I often find them black) or mark them so. For now, there isn't a sure-fire way to make a new color definition (myself, I could do with a number 6 for my many white/ultra-platinum hairs).
Perhaps you wonder why the creator doesn't correct the file her/himself? Many creators don't actually play the game through, especially to the second generation where the difference would stand out. Also, many Simmers (myself included) have custom skintones that include eyebrows so we remove eyebrows from our Sims. Or we use custom eyebrows because we don't like the Maxis ones.
Another major culprit is reusing textures in Bodyshop. I use the same project folder again and again, making a platinum off of a blond and then using the same texture files to make a redhead. The files are still blond at its base because that was what the original hairstyle was when I exported it in BS. There are so many recolors based off of mismatched hairstyles that the problem is compounded. Mismatched hairs and eyebrows are not a gamebreaker. Thankfully, you can use SimPE to fix this little oddity.
Have fun,
~Nessa